
WordPress provides users with very visually appealing websites that can showcase a whole media library of images. In addition, WordPress itself has a great set of image tools to fully optimize and edit your images to be the best quality, appearance and optimization.
Say you have several images on your computer that you want to add to your WordPress website. This sounds easy enough, but there are a lot of options for images once they have been added to WordPress.
It’s important to make the images the correct size, quality and alignment so the images fit into your website content easily.
Also, there are many backend steps to adding images that can fully optimize them for searchability in search engines. This includes things like adding descriptions, tags, alternative text, links, caption, and more.
It’s also easy to upload multiple images and easily delete images from the media library.
The following list is fifteen common WordPress image tasks that can easily create errors in WordPress. The good news is that they also have simple fixes, as the WordPress dashboard is very user-friendly.
1) Add Images
Adding an image to WordPress is essential because images help boost your content, and make it more viewable to readers. All you have to do is navigate to a new post on your WordPress dashboard, and click the “Add Media” top near the top left of the post.
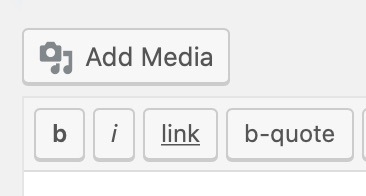

This opens the Media Library, where all of your images are stored. Also, you can upload photos from your computer here with the upload tab.
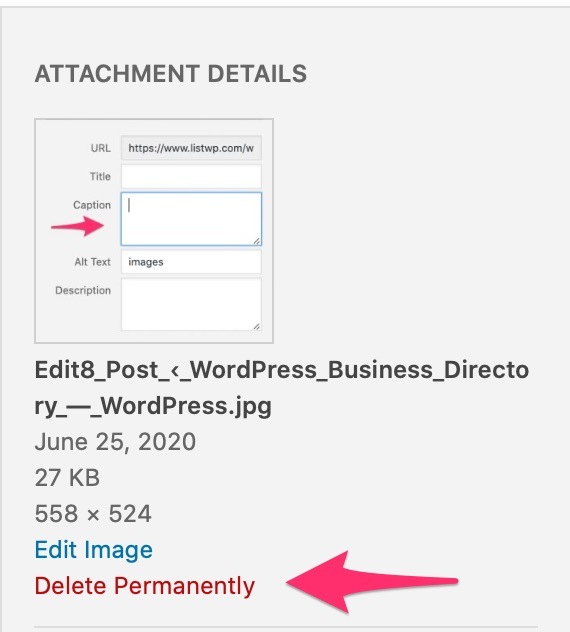
2) Add Captions to Images
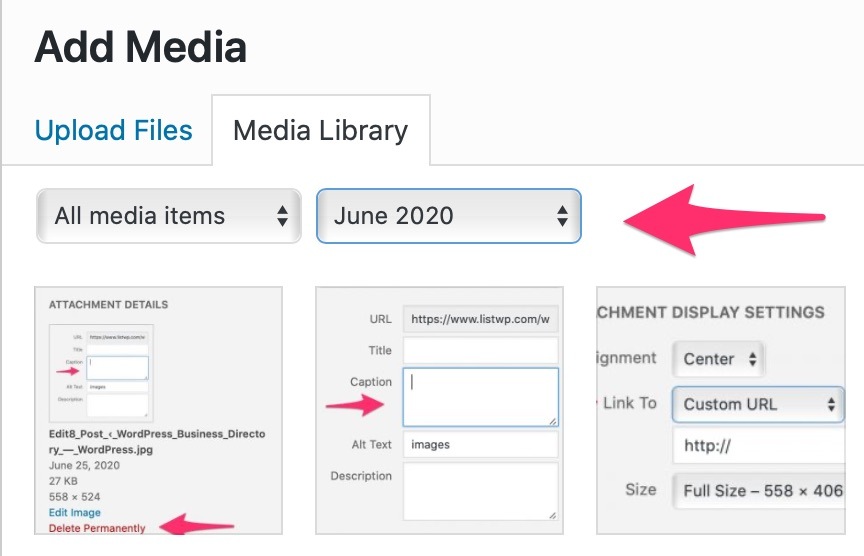
Adding captions to your images is important for several reasons. First, to give credit to wherever you got the image, and second, to explain what the image is showing you. Adding captions can be done easily once the image is uploaded.
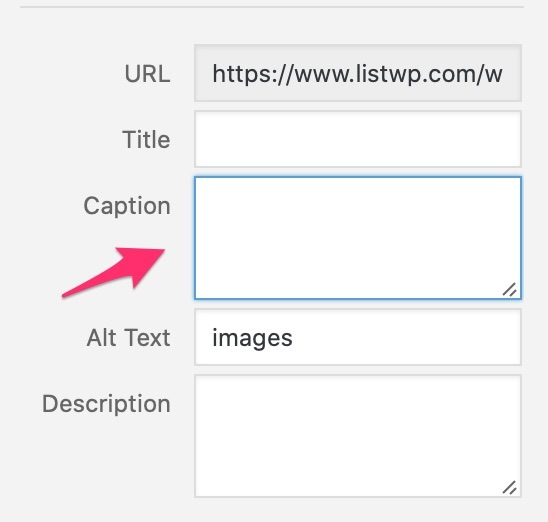

Once an image has been uploaded and clicked on in the Media Library, several image options appear on the right hand tool bar. One of these options is the caption. Put your image source information in this box and click upload.
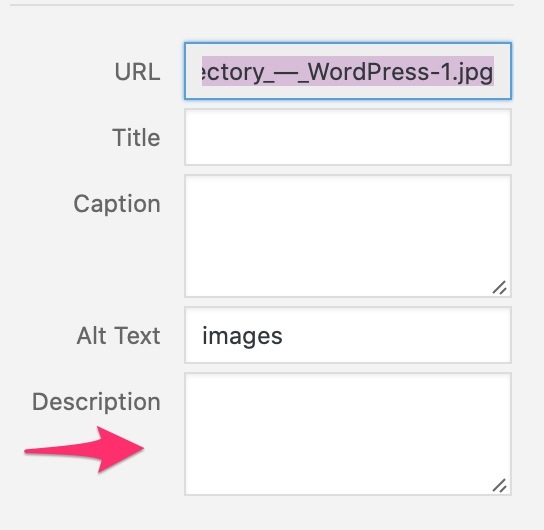
3) Add Descriptions to Images
Images help provide a visual representation of content, but the description of an image can provide additional information about the image. Images in WordPress can have their own URL, and people can see this URL and click on it. When they do, the text in the description will be visible. This is where your keywords should go.

4) Align Images

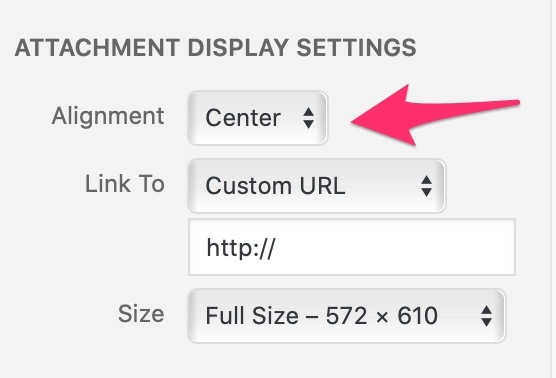
From this screen, you can easily choose either center, left, right or none from the drop down menu.
5) Add Feature Images
Adding a feature image is important because this image is the main image that will be features on the page or post. Featured images go at the top of the post with the title and are usually the largest images on the page or post.


6) Choose Image Size
Choosing the size of your images is important, since you don’t want your images to overpower the page, but at the same time, you don’t want them to be so small that the content or text on them is unreadable. The size options are full size, medium and thumbnail in the image options.
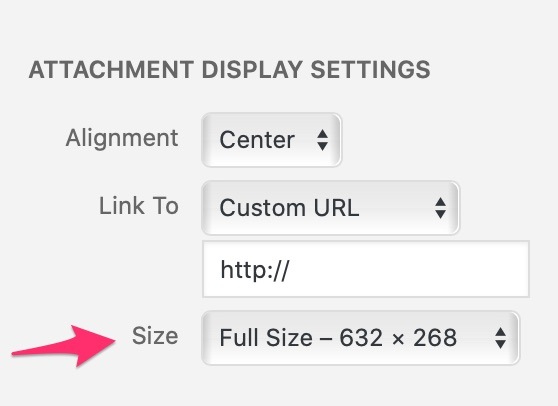

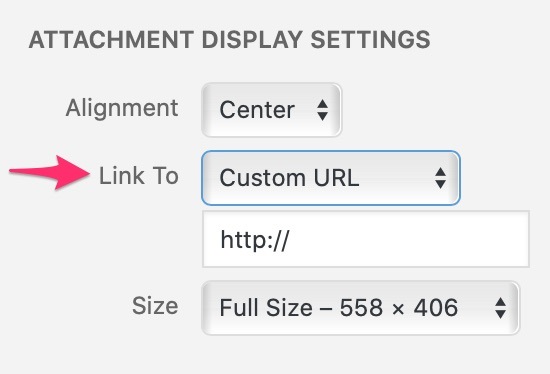
7) Link Images to Custom URLs
Each image uploaded to WordPress can include a custom URL that links to another page or post. Input the custom URL you want ot use once the image is uploaded in the Media Library and then upload the image to save.

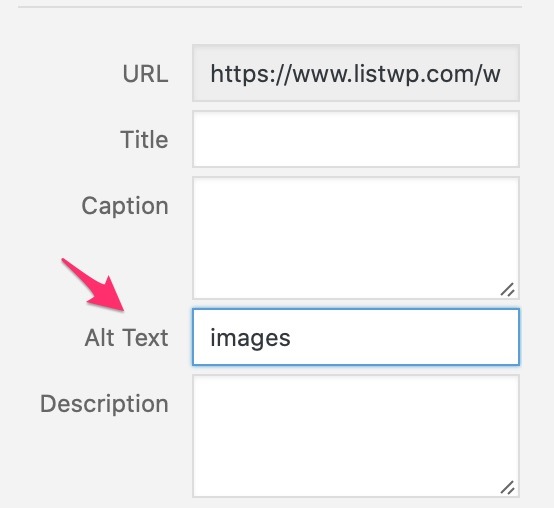
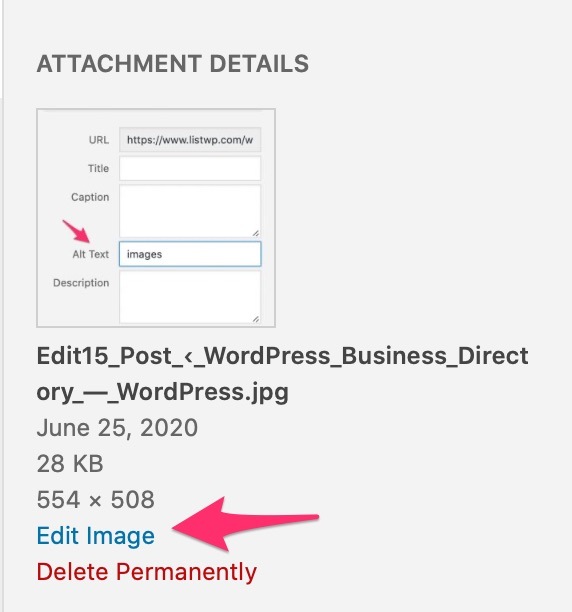
8) Add Alternative Text to Images
Alternative text, or alt text, is a text version of the image. This text shows if the image doesn’t show, so it should explain the image simply and clearly. If the image is a picture of the sky, then the alt text should be sky.

9) Improve Image Quality
Having images on your WordPress website is the first step, but image quality is also equally important. The images should be high quality and presented in a helpful and attention-catching manner to keep people engaged with your content.
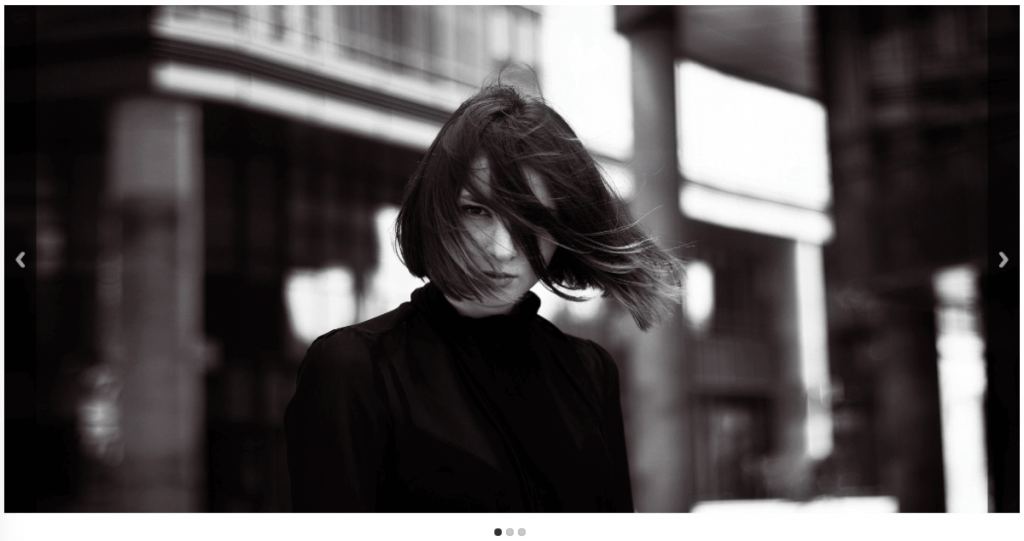
The powerful responsive image slider plugin from CreativeMinds lets users display wide, eye-catching images to attract your visitors. The sliders can appear in many forms including simple, bullet, number, slideshow, and thumbnail. This is also a good choice for using multiple images.
10) Show Images As Pop-Ups
Another way to introduce images with your content is to present them as pop-ups on your website. Have an image you really want to showcase? Have it pop-up when a post is opened. There are different types of pop-ups as well, and you can use how and when they appear on a page or post.

The Pop-Up plugin for WordPress by CreativeMinds helps users add responsive popup banners to a WordPress website with custom messages and effects. The plugin is great for lead generation and adding images and even videos to posts and pages to promote products and services.
11) Delete Image Files
Deleting image files is as simple as one click of a button. Once images are uploaded to the Media Library, you can click on them to insert them into posts. There is also an option on the right hand side to delete the image permanently from the library.

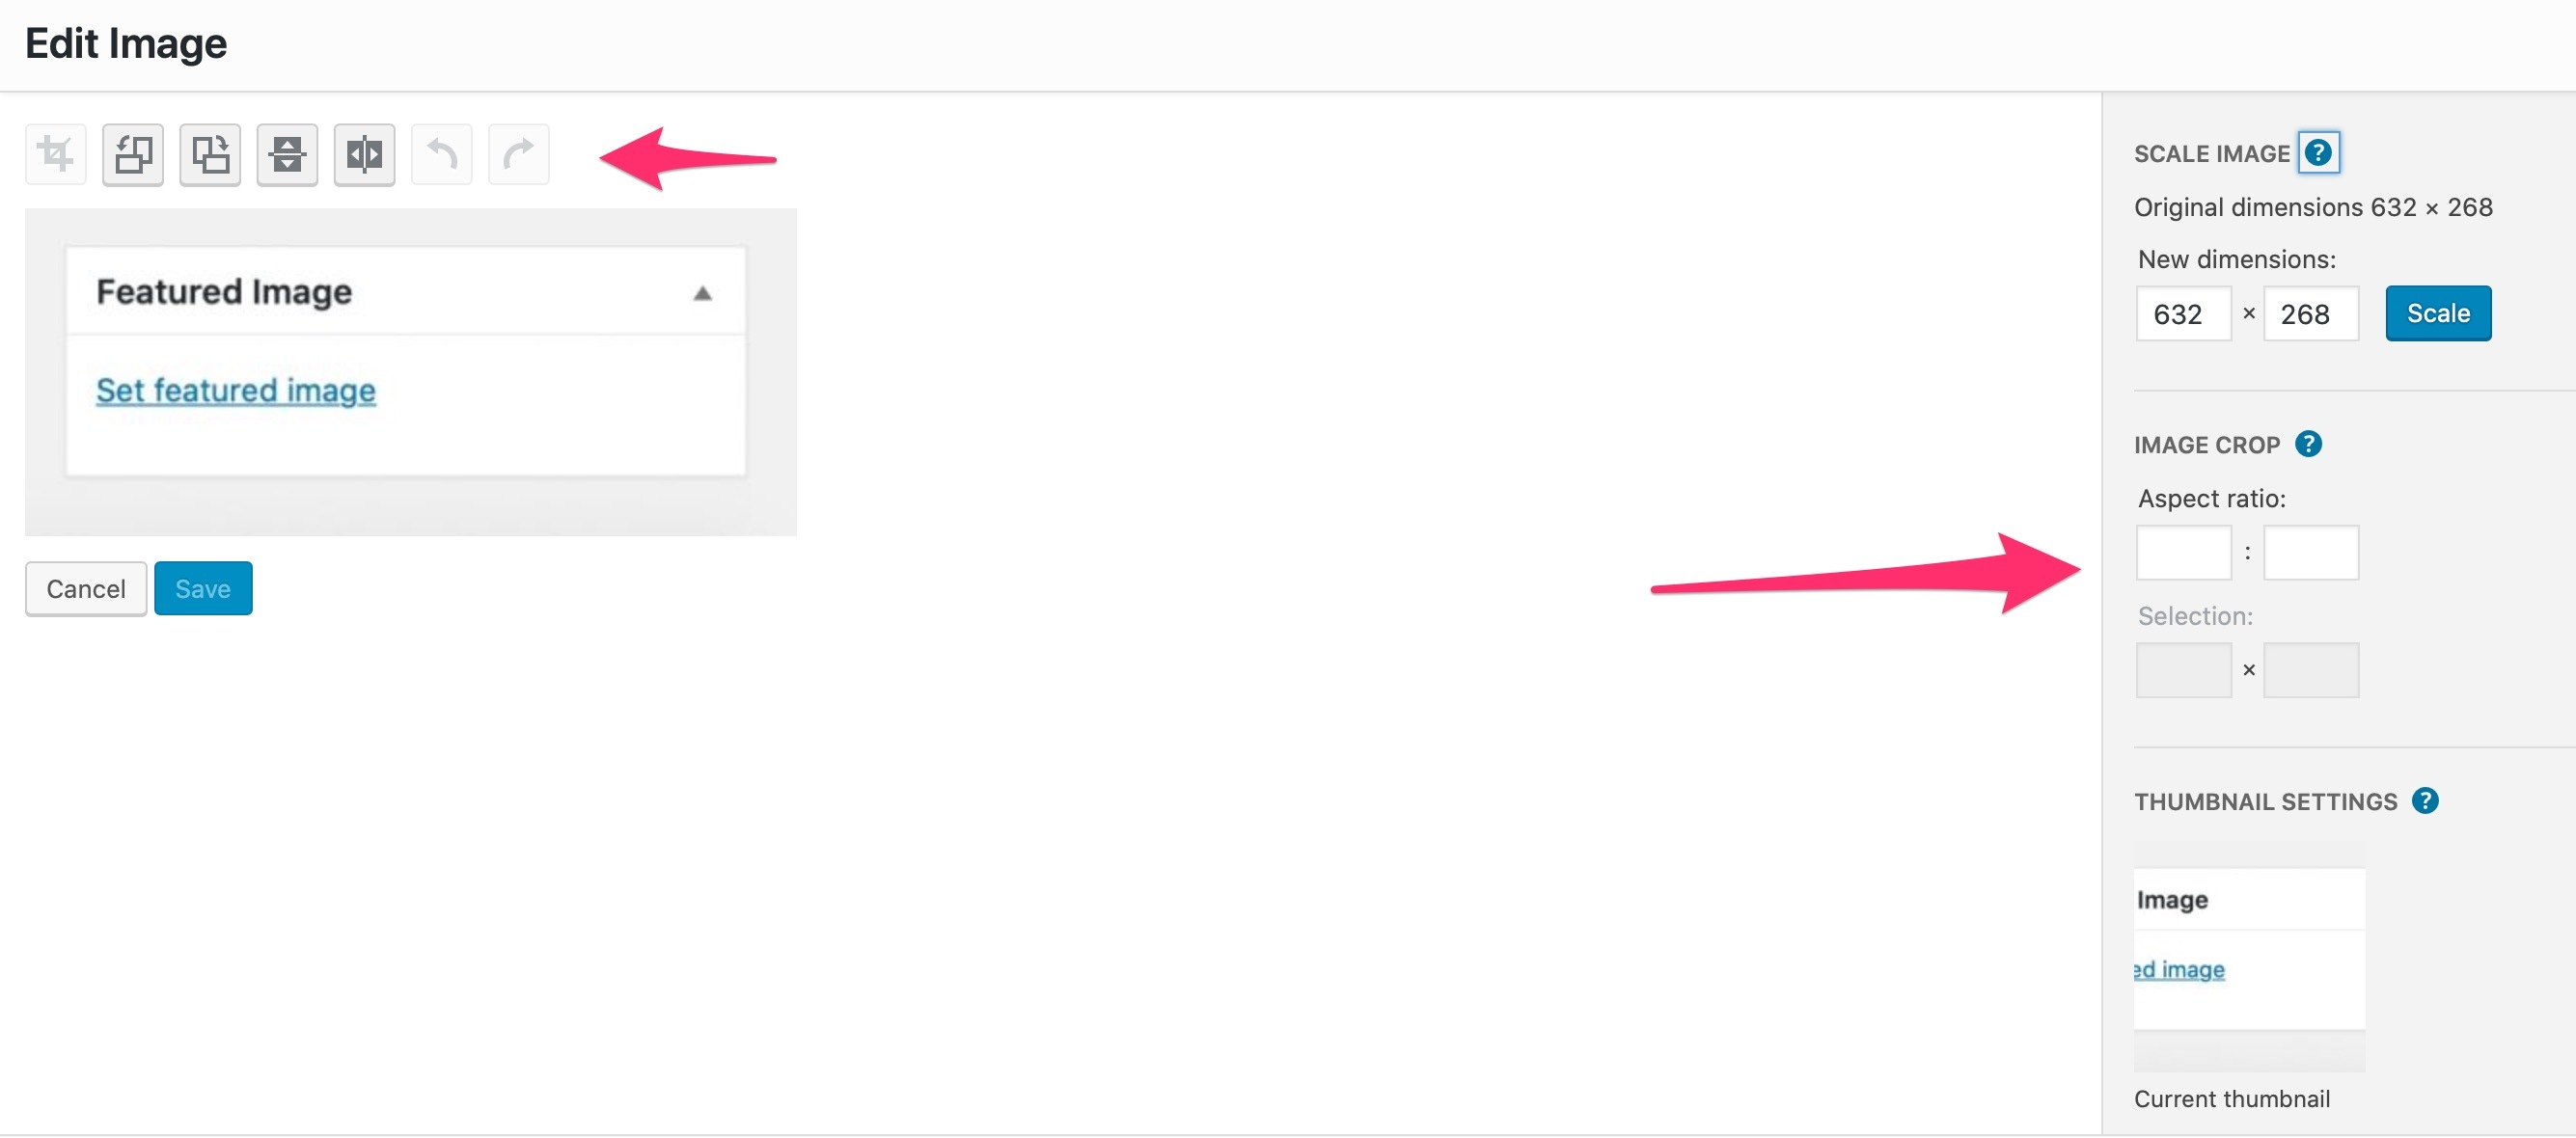
12) Edit Image Appearance
WordPress provides some excellent image appearance editing options, such as cropping and rotating images. simply click on an image in the Media Library and click “Edit” on the right-hand side.

A new window will open with rotating image options above the image and cropping to the right.

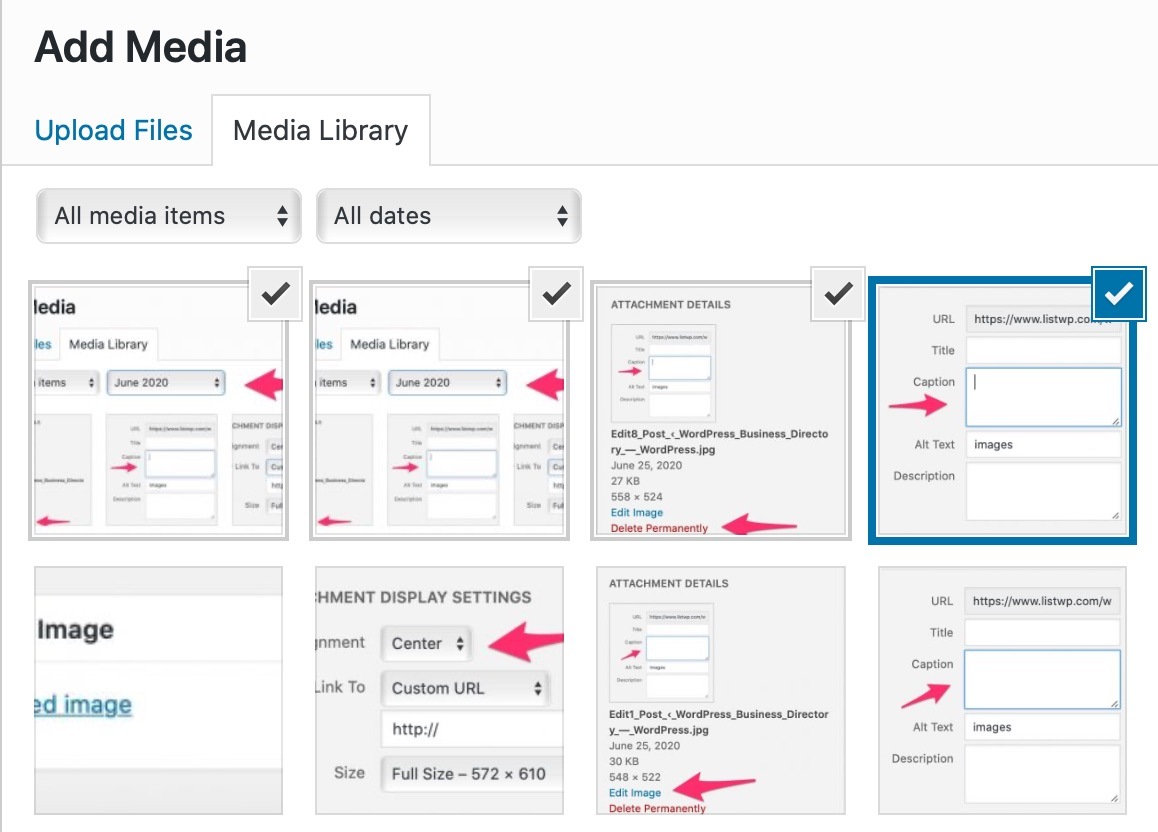
13) Add Multiple Images
Sometimes you want to add multiple images to your WordPress website, or add images in bulk. You can do this by using the bulk adding tool in the Media Library. Simply click on the images to highlight them in blue and then click on add images.

14) Replace Images
Have you placed the wrong image on a page or post? Simply click on the image you want to change and then return to the Media Library. From there choose the correct image you want to use. Also, you may need to unclick the image you want to replace so that it is no longer highlighted. Only one image should be chosen on the screen.
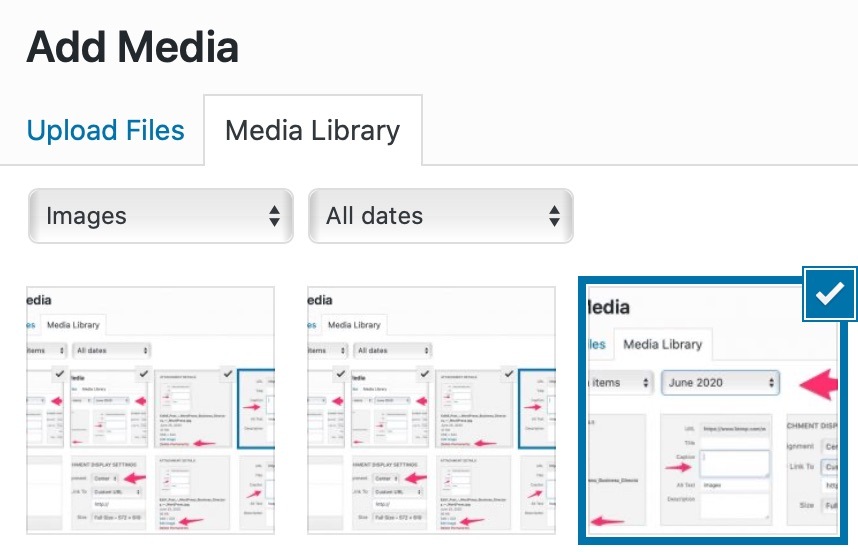

15) Locate Images in WordPress
Admin tend to upload quite a few images to the Media Library. One way to keep all the images organized is by their upload date. If you need to locate a certain image, all you have to do is click on the drop down menu for the month you uploaded the image to more easily find it.

Conclusion
All of the steps included in this list as simple images changes or fixes that you can do in order to make your images display the best on your WordPress website. WordPress is a very user-friendly website, so these changes are quick fixes and simple to complete.


